
In Salesforce Revenue Lifecycle Management (RLM), the product configurator is a powerful tool that allows users to tailor product configurations to meet specific business needs. In this tutorial, we will walk through the steps of using the standard configurator, cloning it to create a custom configuration flow, and assigning this custom flow to a product or product classification. Let’s dive right in!
Step 1: Understanding the Standard Configurator
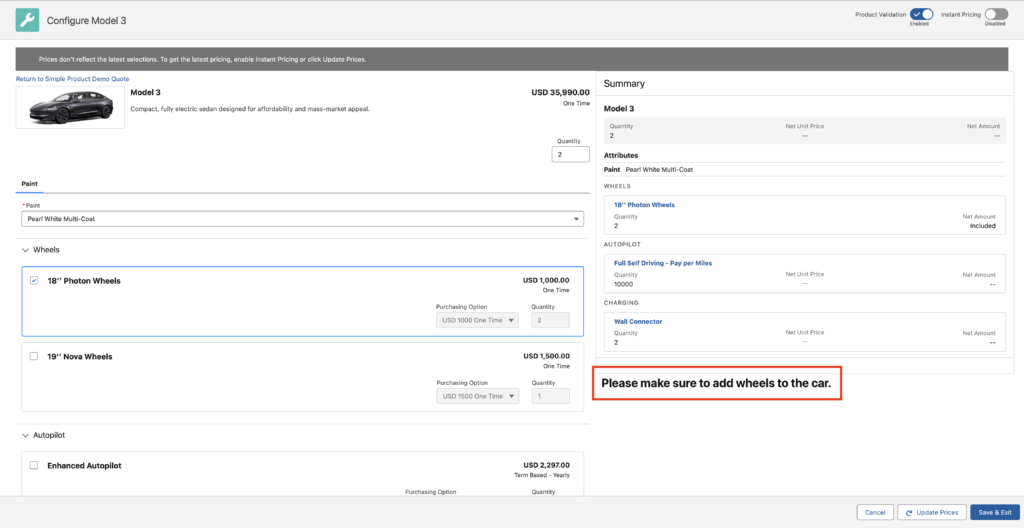
The standard product configurator in Salesforce RLM provides a seamless interface for configuring products within the Transaction Line Editor. Here’s what it looks like:

- Navigating to the Configurator:
- In the Transaction Line Editor, locate your product model. Click on the arrow next to it and select “Configure.”
- This opens the default configurator, which displays product details, attributes, and options on the left side, while the pricing summary appears on the right. If instant pricing is enabled, it updates automatically or when you click “Update Pricing.”
Step 2: Cloning the Standard Configurator to Create a Custom Flow
To customize the product configuration flow, Salesforce RLM provides a default flow template that you can clone and modify according to your requirements.
- Accessing the Flow Editor:
- Navigate to the Flow Editor in Salesforce. You will find the default product configurator flow which serves as a template.
- This template cannot be modified directly. However, you can clone it by saving it as a new flow.
- Cloning the Flow:
- Click “Save As” to create a new flow from the template.
- Name your new flow (e.g., “Demo Custom Flow”) and save it.
Step 3: Modifying Your Custom Flow
Once you have cloned the flow, you can customize it to include additional components, messages, or data mappings.
- Adding Components:
- In the Flow Editor, you can add various components. For instance, you might add a display text component to show a message to the user.
- Example: Add a display text component with the message, “Please make sure to add Wheels to the car.”

- Customizing the Interface:
- You can further modify the screen by resizing components or adding other elements to enhance the user interface (UI) and user experience (UX).
- Saving and Activating Your Flow:
- Once your modifications are complete, save the flow and ensure it is activated.
- You can find the Flow API name by navigating to the flow’s details page, which will be used for assigning the flow later.
Step 4: Assigning Your Custom Flow
After creating and customizing your flow, the next step is to assign it to a product or product classification within Salesforce RLM.
- Creating a Product Configuration Flow Record:
- Go to the Product Configuration Flow tab in RLM.
- Click “New” to create a new product configuration flow record.
- Enter the Flow API name of your custom flow (e.g., “Demo Custom Flow”) and set it to active. Do not set it as the default unless you want it to apply to all products by default.
- Assigning the Flow to a Product:
- Navigate to the Product Configuration Flow Assignment tab.
- Create a new record, choosing either a specific product or product classification.
- Select the product (e.g., “Model Tree”) to which you want to assign the custom flow and save the record.
Step 5: Testing Your Custom Flow
To ensure that your custom flow is working correctly:
- Reload and Test:
- Return to the Transaction Line Editor and reload the page.
- Select the product you assigned the custom flow to (e.g., “Model 3”), click the arrow next to it, and choose “Configure.”
- Verify that your custom message and any other modifications are displayed correctly.
By following these steps, you can leverage Salesforce RLM’s flexibility to create and assign custom product configuration flows, enhancing the configurator experience for your users.
Additional Resources
For more detailed information and step-by-step guides, subscribe to our Youtube Channel.