
In this tutorial, we’ll walk through the steps to create a new bundle product in Salesforce Revenue Lifecycle Management (RLM).
We’ll start by adding an existing bundle product to a quote, then create a new bundle product from scratch, and finally test the new bundle to ensure it’s configured correctly.
Adding a Bundle to a Quote
Integrating a bundle into a quote in Salesforce Revenue Lifecycle Management is similar to adding a simple product. This section guides you through adding an existing bundle—like a Tesla Model 3—to a quote, ensuring the product fits into your sales strategy.
Selecting the Bundle
To begin, navigate to your quote and select the ‘Browse Catalogs’ option.
From here, you can choose the appropriate catalog and then select the bundle product you wish to add. For instance, selecting a Tesla Model 3 from the cars category showcases its availability in the catalog.
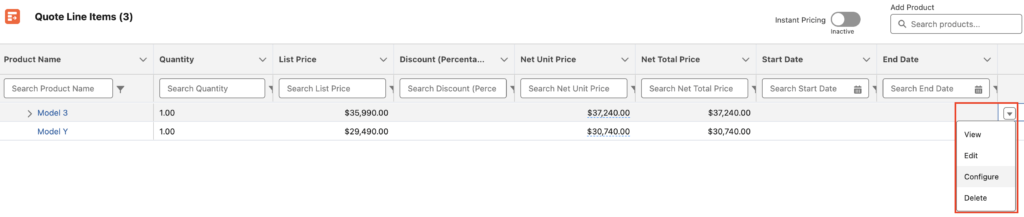
Configuring the Bundle
After adding the bundle to your quote, you can configure it to meet specific customer needs by clicking ‘Configure’ on the quote line item.
This involves (in the car example) selecting attributes like paint color, which directly impacts the price, and choosing between different options for wheels, autopilot features, purchasing options (one-time fee or subscription), and additional accessories.
Each selection updates the net amount (when ‘Instant Pricing’ is enabled) and options on the right-hand side, ensuring you have a clear overview of the customizations.
Finalizing the Bundle Addition
Once the configuration meets your requirements, saving your selections will update the quote with all selected products and their pricing.
Creating a New Bundle
Creating a new bundle product in Salesforce RLM allows for customized offerings that match with your business processes. This section walks through the creation of a new bundle, such as the Tesla Model X, from scratch.
Defining the New Bundle
To create a new bundle, navigate to the products page and select ‘New’.
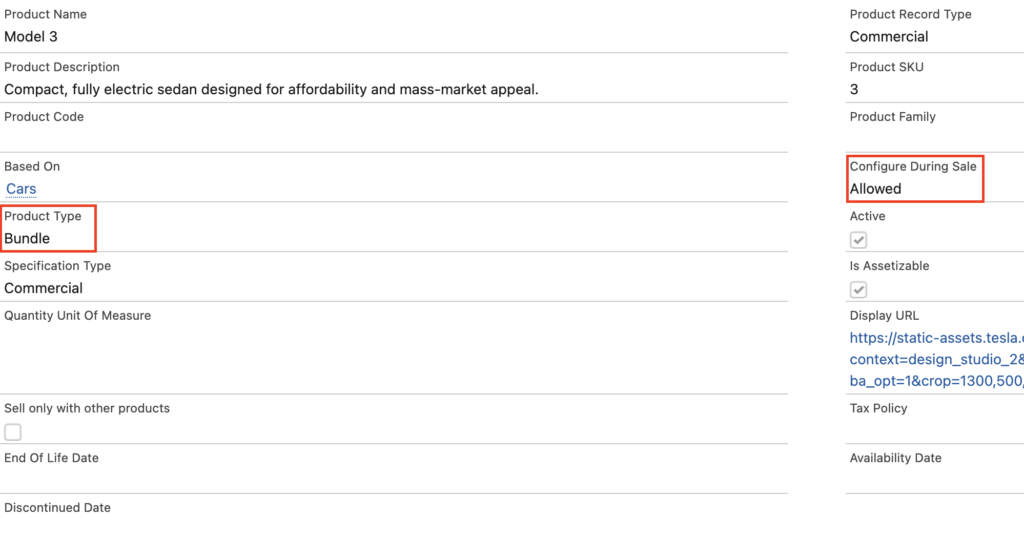
Here, you can define the bundle’s name, assign it a product code, and set it as active. Ensure ‘Configure During Sale’ = Allowed and ‘Product Type’ = Bundle so the product is available as a bundle, to allow configuration during the sales process.
Setting Up Pricing and Structure
After defining the bundle, the next steps involve assigning it a price book entry and a product selling model option.
For instance, setting the selling model to ‘One Time’ reflects the purchase nature of a car. Following this, add the bundle to the price book with its list price, completing the initial setup.
Creating the Bundle Structure
After defining the bundle and its initial setup, the next step is to create a structured and comprehensive bundle. This involves organizing product groups and assigning specific products to these groups, ensuring a seamless configuration experience.
Adding Product Groups
Product groups are essential in categorizing the various options available within a bundle. By setting parameters such as the minimum and maximum number of selections allowed, and the sequence in which they appear, you guide the user through a logical and efficient configuration process.
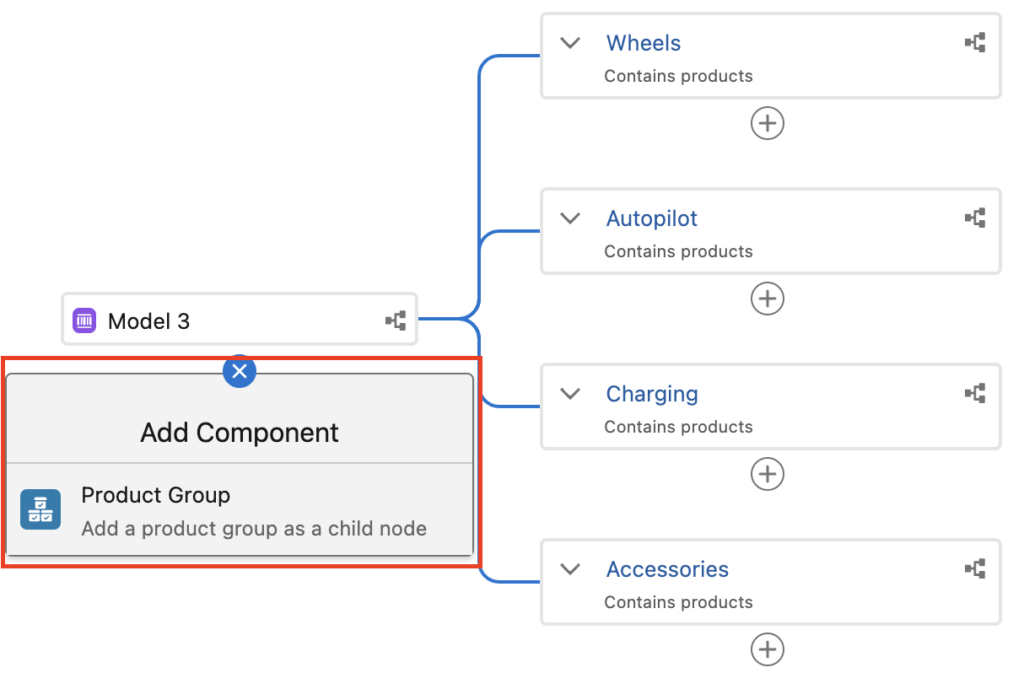
In our example, creating groups for Wheels, Autopilot, Charging Options, and Accessories allows for a structured approach to customizing the bundle.
Assigning Products to Groups
Within each product group, specific products are assigned to match customer preferences and requirements.
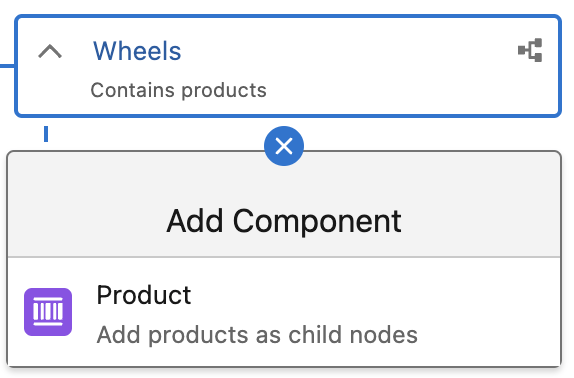
This step will determine which products are available within the different product groups created in the previous step.
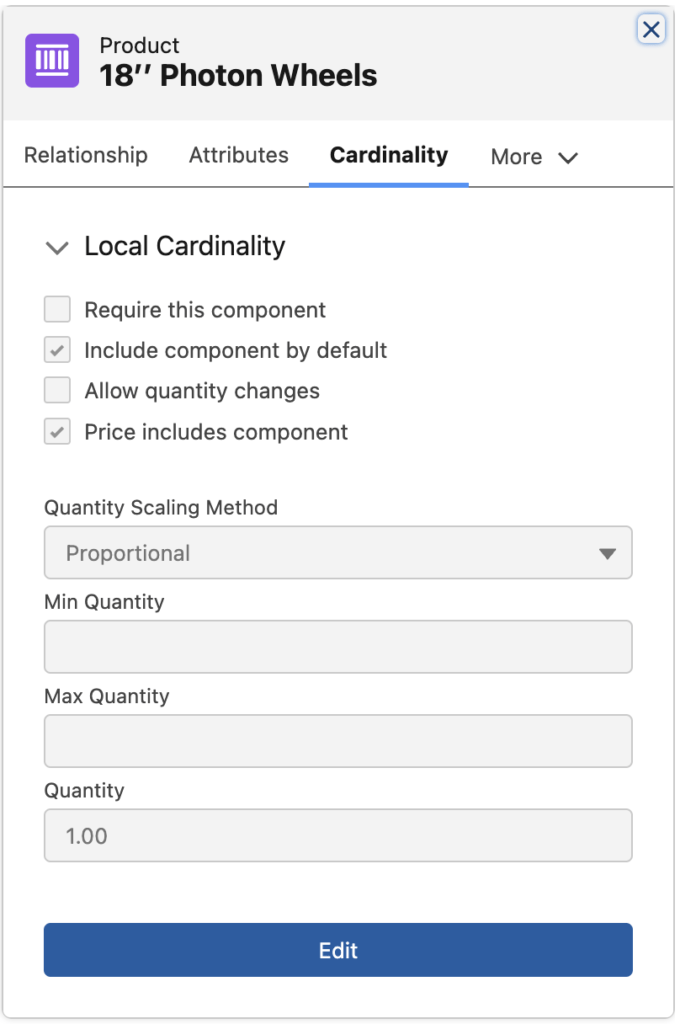
By setting sequence numbers, default quantities, and inclusion criteria, you are defining the user experience and rules for your bundle.
Validating the Bundle Structure
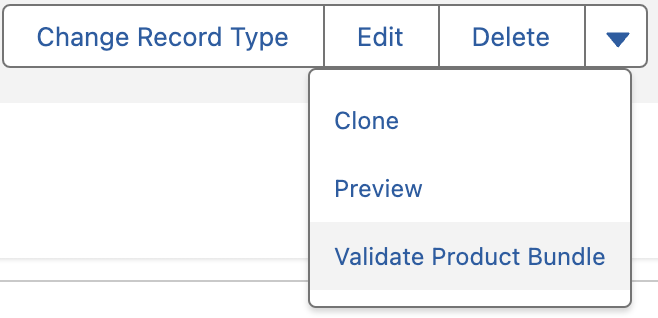
From the Bundle Product record page, click on ‘Validate Product Bundle’ to confirm you do not have any invalid configurations.
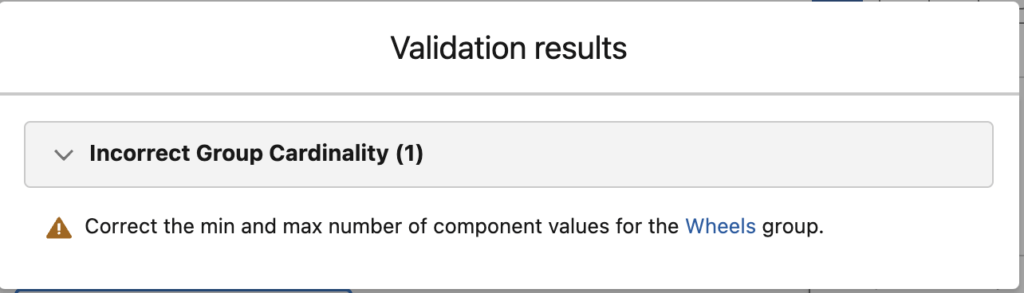
If it’s setup correctly you’ll get the following message :

If you have an invalid configuration, you’ll get the following error message (error message will vary based on the invalid configuration) :
Testing the New Bundle
Once the bundle’s structure is in place, thoroughly testing it is imperative to ensure it meets both the business’s and customers’ expectations.
This involves verifying the configuration options, pricing accuracy, and the end-to-end process of adding the bundle to a quote.
Syncing Pricing Data
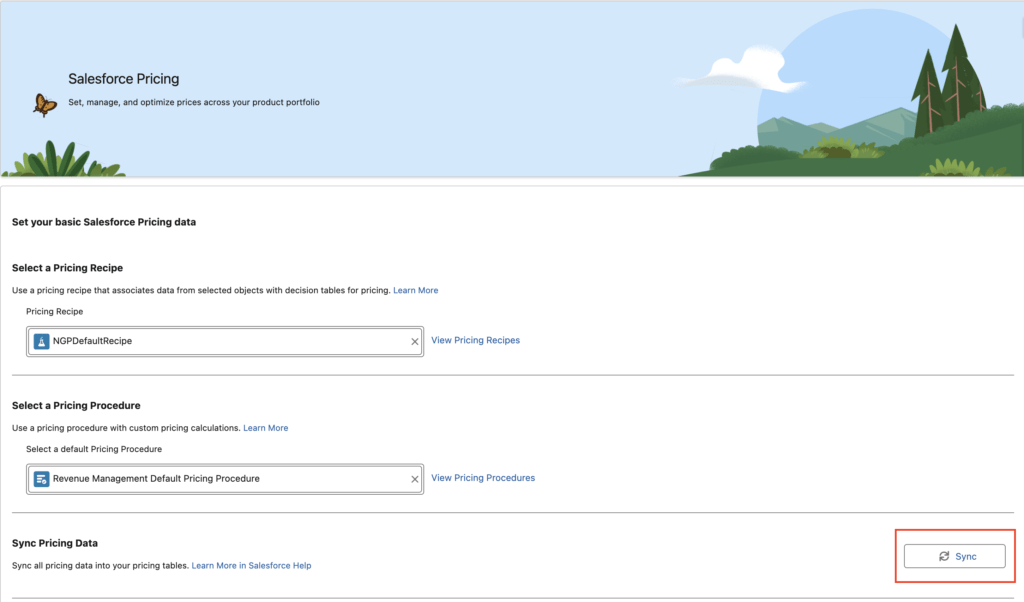
Ensuring the new bundle’s pricing data is correctly synced is a crucial step before testing. This ensures that when your new bundle and its pricing is available for quoting.
Any changes made to pricebook entries and pricing updates need to be synced before they’re available in the transaction line editor.
To ‘Sync Data’:
- Go to ‘Setup’
- Then ‘Salesforce Pricing Setup’
- Then hit ‘Sync’ under ‘Sync Pricing Data’
Adding the Bundle to a Quote
Testing the bundle in a quote scenario is the final step.
This involves selecting the bundle from the catalog, configuring it according to different customer scenarios, and verifying that the pricing updates accordingly.
It’s essential to check that all options within the bundle are correctly displayed and that any rules regarding minimum or maximum selections are enforced.
If any of the product bundle configuration doesn’t respect the established setup, you’ll get an error message in the Configuration Screen.

Successfully adding the updated configuration to a quote and seeing accurate pricing information confirms the bundle is ready for deployment.
By following these steps for creating and testing a new bundle in Salesforce Revenue Lifecycle Management, you can configure your bundles to match your business requirements.
Thanks for reading through, please reach out with any questions on the Salesforce Revenue Lifecycle Management bundle creation.
Related Resources
Related: How to Create a Configurable Subscription Product in Revenue Cloud