
In this tutorial, we’ll dive into the process of creating a product within Salesforce’s Revenue Lifecycle Management (RLM) suite.
We’ll cover the steps from creating a new product and review how to add it to a Salesforce Revenue Lifecycle Management quote.
Creating a New Product
Creating a new product within Salesforce Revenue Lifecycle Management is a straightforward process that allows for detailed customization. This section will walk you through the steps required to introduce a new product into your catalog.
Initiating Product Creation
To start, navigate to the ‘Product Catalog Management’ homepage and select ‘Products’. Clicking ‘New’ opens up the product creation interface, familiar to those who have worked with Sales Cloud and Salesforce CPQ.
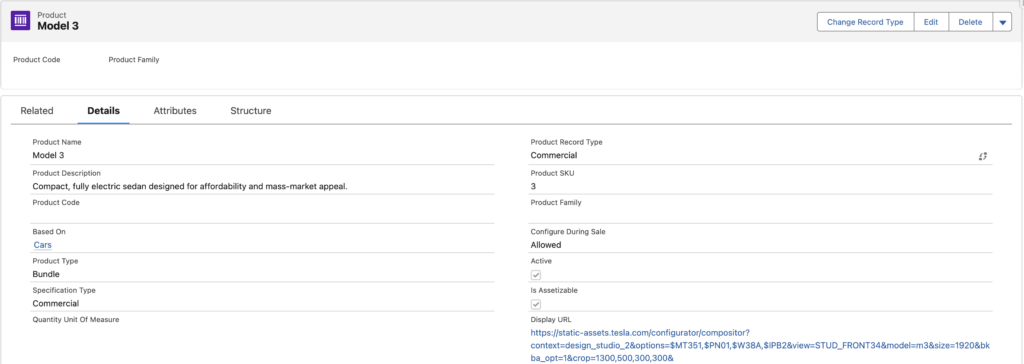
Configuring Product Details
Here, you can assign your product a name, SKU, and other essential details. It’s important to set the product to active and decide on its assetizability. For products meant to be sold individually, ensure that the option to sell only with other products remains unchecked.
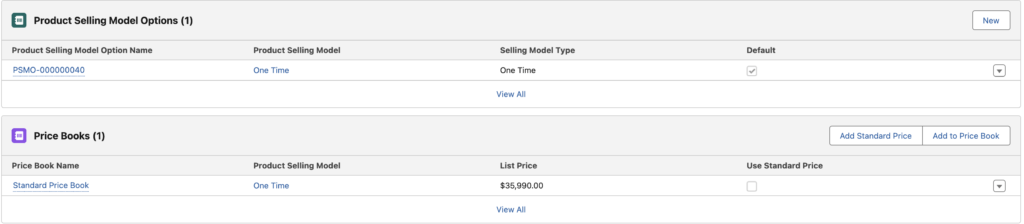
Setting a Selling Model and Price
Defining your product’s selling model is next, where you decide if it’s a one-time purchase or term-based. Following this, add the product to the price book with an assigned list price, completing the basic setup.
Adding to Catalog and Syncing Pricing
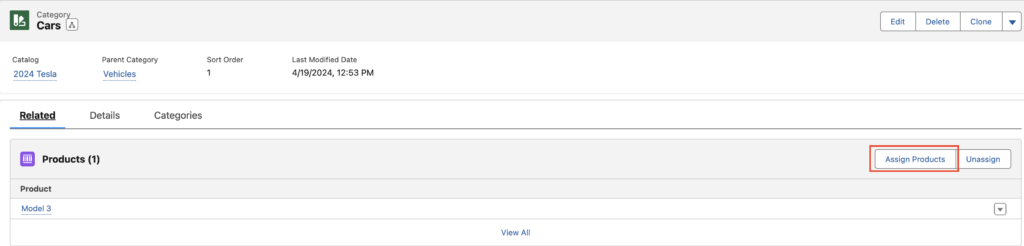
Finally, assign your new product to a category within your chosen catalog. This categorization is crucial for organization and easy access. However, to make the product available for quoting, syncing the pricing data via the ‘Setup’ menu is a necessary last step. This ensures that the newly added product and its pricing details are up-to-date and accessible for quoting purposes.
Through these steps, Salesforce Revenue Lifecycle Management not only simplifies product creation but also enhances the overall efficiency of managing product catalogs and quotes.
Testing the New Product
After meticulously going through the process of creating a new product and ensuring it’s properly added to the catalog, the next crucial step is testing to see if it seamlessly integrates into a quote. This phase is essential for verifying the practical application of the new product within Salesforce Revenue Lifecycle Management.
Refreshing and Browsing Catalogs
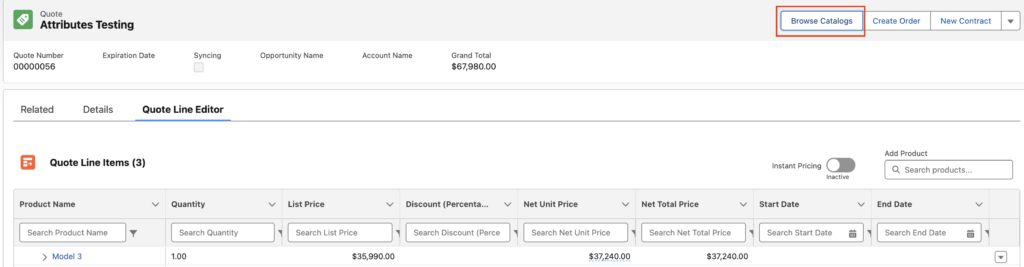
First, refresh the quote to ensure all data was up-to-date. Navigating back to the ‘Browse Catalogs’ section, select the relevant catalog and moved forward to find the newly created product listed among others.
Filtering and Adding the Product
Filter the ‘Browse Catalogs’ page on the category you’ve added your product to in order to see your newly added product. Add it to your quote and save the quote.

Finalizing and Saving the Quote
After adding the new product to the quote, adjust the quantity and apply a discount, similar to the process with other products. This step confirms that the pricing updates and calculations were functioning as expected, showcasing your newly created product.
Conclusion
I hope this overview of the product creation process in Salesforce Revenue Lifecycle Management was helpful. Please let me know if you have any questions.
Related Resources
Related: How to Create a Configurable Subscription Product in Revenue Cloud